Showing posts with label what the art teacher wore. Show all posts

Saturday, December 14, 2024

My Christmas Tree Skirts to Lady Skirts Over the Years!

Hello, friends! If you've been hanging with me on this here blog for a while, then you know that I've transformed many Christmas tree skirts to lady skirts over the years. In fact, I've been doing it for so long that it was before I even created videos! So many of my tutorials were old school: photos and WORDS, y'all. Today I thought I'd take you on a little stroll down Christmas tree skirt to lady skirt lane in case you are so inclined to create your own. And you should! It's super fun! You can check out the skirt I made last year...here!
I have a coupla hot tips when it comes to this super easy craft. First...

* Get your tree skirt after the holidays. Pop into your local home dec, big box or craft store and scoop them up when they are half off or even cheaper.

* Vintage tree skirts can be found on Etsy or eBay. I've purchased a couple of my favorite ones from eBay. 

* Be on the lookout all year long! When I hit the thrift stores or estate sales, I always scoop up vintage tree skirts and stash them for later. 

* Get skirts that are large! If you order some online like from Amazon, be sure to check the measurements. Some tree skirts are meant for smaller trees...and could lead to a mini-skirt for ya!

* Get your self a crinoline. I get mine from Amazon. This will really give the skirt it's fullness so it can be admired in all of it's tree skirt glory.

Here's a video tutorial I created just for you:

If you'd like to visit my other blog posts with more step by step details, here's some of my skirts and the blog posts I've shared over the years. 

I can't believe this skirt is over 10 years old now! This was a hand-stitched tree skirt that I found on eBay. More details here. 
The following year, I made this skirt! I will say...this one is super warm and cozy BUT it was impossible to sew threw on my machine. So the skirt is just hanging on in the back with Velcro. This, I don't recommend. Cuz when your behind feels a draft...it's too late. All the gory deets here. 
Here's another vintage one purchased from eBay! Last year the zipper broke on this one so it looks like I'll be doing a little repairing before taking it out again. 
You'll notice how my tree skirts keep changing on my little vintage silver tree...that's because each year I pretty much rob my tree of it's skirt! Now this green tree skirt was a little shorter than others I have used. You can check out more about it here. 
Okay now this one...is actually a vintage round tablecloth! I did add the tinsel to the bottom and made it into a skirt much the same as the other skirts. More info here!

And that's it! I'm not sure if I'll make a tree skirt to lady skirt this year...even though I do have a back stash of skirts. You'll have to stay tuned on that one ;) Have a wonderful weekend, friends!

photo signature_zpsd10b3273.png
Read more »

Monday, September 18, 2023

DIY: Embroidered Eyeball Earrings!

We were traveling to Halloween Horror Nights in Orlando this weekend (our very favorite thing ever) and I decided to take an airplane craft with me. I love to take little embroidery projects with me because they are lightweight and easy to transport. Earrings are my favorite things to embroider: they are quick and easy to make and super lightweight to wear. I've made several now and I've shared the process on each in this blog post!

I broke down the steps so you can make your own!

Now if these eyeball earrings of mine are giving you a little deja vu...that might be because I recently shared an eyeball necklace DIY!

If you wanna go bigger with your eyeball theme, then I have a video on how to create these eyeball ornaments right here!
I even made an eyeball dress! It's one of my favorites. You can check it out here. 
I am in love with these! I now feel like I need a whole set of Halloween embroidered earrings. I'm thinking skulls, pumpkins, ghosts...you name it!  

I also think that if you need a simple intro to embroidery project, this might be it! You can also check out all of my fibers projects here! 

Please do lemme know if you make some eyeball earrings so we can be twinsies! Have fun!

photo signature_zpsd10b3273.png


Read more »

Monday, September 11, 2023

DIY: Let's Sew a Dress from a Shower Curtain IN ONE DAY!

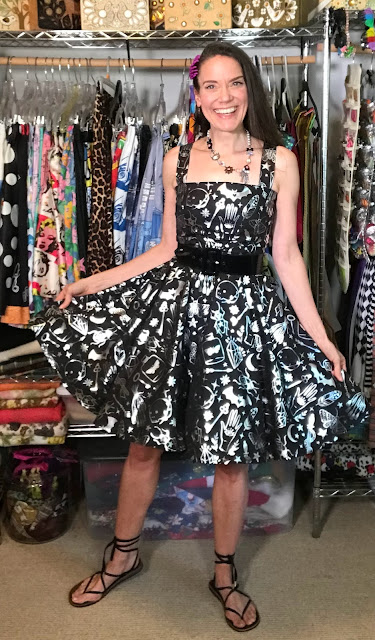
Recently, I was out poking around at Ross (for those unfamiliar, this is a discount everything store) and I stumbled upon the cutest shower curtain. It had a big and bold print on the fabric (which I love and is super hard to find) and it was Halloweenie! I'm a big fan of Halloween and I've already stitched up two dresses for the season (one I've not even shared here yet!). So I scooped up this shower curtain for a mere $8.99 and gave myself a challenge:

SEW A DRESS IN ONE DAY!

Let's see how it went:


Y'all! I love it! 

I was super surprised that the metallic print on the fabric was so resilient. It didn't chip off when I stitched it which was my big fear. The fabric is super light and flowy, making it perfect for a circle skirt. AND I was surprised to find that when I ironed the fabric, it didn't harm the print! 
I am wearing a crinoline under the dress to help with the poof. I'm a sucker for a poofy skirt. 
I'm returning to Halloween Horror Nights this week...which is in Orlando. Knowing it will be hot, I'm excited that the dress is so lightweight. I can't wait to wear it!
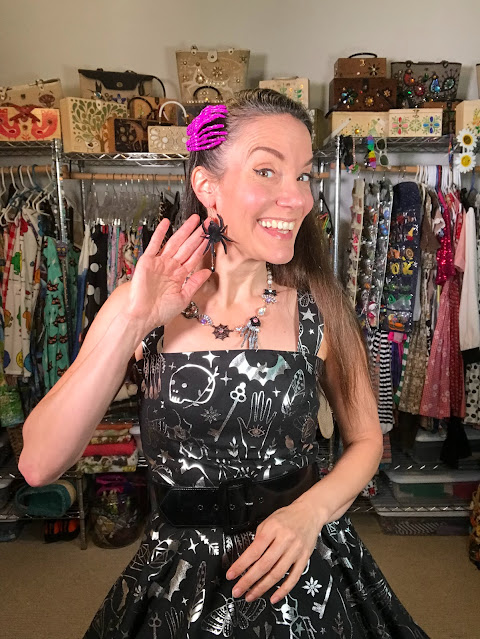
I paired it with this black belt but I'm thinking I may prefer the black bow. What do you think?

I paired it with this necklace I found at TJMaxx (clearly, I'm a shopper) and some fun earrings and hairclips that I've had for years.

So I'm happy to say...I can sew a dress in a day! From a shower curtain of all things!

AND I just remembered...this isn't my first time using a shower curtain for clothing! Check out this number!


photo signature_zpsd10b3273.png
Read more »

Wednesday, April 19, 2023

What the Art Teacher Wore Closet Tour!

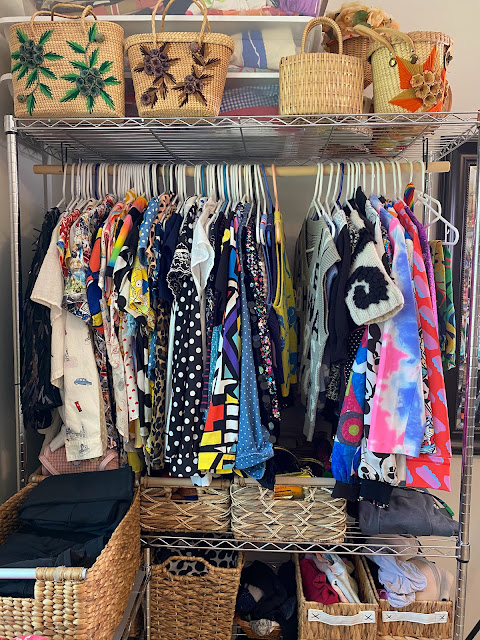
Hey there! Today I thought I'd share a tour of my closet!

I've been asked many times to do a little closet tour and I DID do one a while back...when my closet was an actual closet. You can check that blog post out here. But there have been MANY reasons why I've always hesitated:

1. Because my closet is now a room. And, like, that's kinda crazy. And excessive. And...a lot of things. I know this. But honestly, this room was just sitting unused. We don't have kids and we don't host house guests (yes, the family stays at hotels when they visit. Trust me when I say it's a beautiful thing). So we had this unused room. And now it's my closet.
 
2. Because...I have an embarrassing amount of stuff. I don't get rid of anything, y'all. Well, I take that back. I do weed out 'trendy' impulse-buy items. These days I try to only pick up thrifted and resale clothing as well as artist-made goods. Notice the key words "I try"...but fashion is my creative outlet so and your girl loves to create ;).

3. Because this space is usually messy. I've had it kinda organized for a while but not until recently did I really get a place for everything. And while it's clean, I thought what better time to tour!

It's a long-winded tour. I had to stop and share all my fave things, right? So I apologize for the length but...here you go! My closet tour!


I created an Amazon store with links to all of the organizational items I share so I'll be posting those down below. I know I struggled to find what works for me. Being a visual person, all of my stuff has to be out where I can see it. I tried to fight that method of organizing for a long time...but now I embrace it. It works for me!
Closet organizational items can be found here. From the pegboard, to the storage stool; from the cart to everything else, it's all in that link!
I will be creating a Thrift Shop video soon in case you aren't sure where to start when you hit the thrift. It's a blast but can be discouraging if you don't have any luck. It's one of those things where you gotta go often and keep an open mind. 
Whenever we travel to towns, I always look for thrift and vintage shops to hit up. Fabric stores are fun too because then I can score something unusual to make into a dress!
For links to these wire racks and more home organization, check here
If you saw my sewing room tour, then you know my love for clear bins and wire racks
Here are more links to things you might see in the video:


If you have any questions, feel free to drop them in the comments on the YouTube video. I had to turn off the comments here; I was getting so much spam it was crazy! 
But if you are looking to embrace your inner fashionista or just wanna organize as a visual person, lemme know. I'd be happy to help!
Until then, thanks for joining me!


photo signature_zpsd10b3273.png
Read more »

Sunday, March 27, 2022

Vincent van Gogh Inspired Buttons and Earrings!

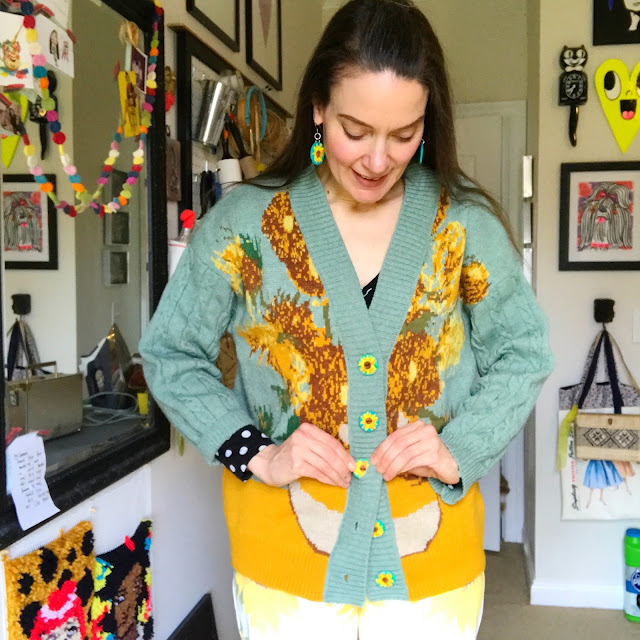
Hi! I scored this amazing sweater recently and while I absolutely loved it, I hated the obnoxious plastic white buttons that were on the sweater. They just stuck out like a sore thumb! So I picked up some polymer clay at the craft store with the idea to create my own. Normally, I buy the 'name brand' polymer clay but this time, I was feeling cheap and decided to give the house brand a try. It was half the price and I have to say...despite the fact that the yellow clay stained my hands a pinch, it worked great! I'm used to stained hands so, no big deal!
I went about creating these factory style and it went pretty quickly. I made a video to share the process in case you need some van Gogh bling in your life. Like, duh. Of course you do.

So easy, right?
Once complete, I just stitched these onto my sweater and added some jump rings and a French hook to the earrings and I was all set in my new upgraded van Gogh sweater!

Not only that but this craft was just the creativity thirst quencher I needed this weekend. Thanks for letting me share, y'all!
photo signature_zpsd10b3273.png
Read more »

Monday, September 2, 2019

DIY: Spoonflower Student Artwork Dress!

I've had it on my mind to print my students artwork on fabric for a very long time. I've done just about every variation of kid-created fabric for dress-makin' such as having them color IKEA coloring sheet fabric which I then stitched into a dress (more details on that dress here): 
Or the time I found the fabric of picture frames! I had my students draw their self portraits on the fabric before creating that into a dress. Both of these dresses were created with Graffiti fabric markers. They've seen plenty of washing and, while the colors have faded a bit, they still look pretty vibrant. And the kids absolutely love them. More details on that dress here. 
But the idea of creating fabric from student work is one that I've been toying with every since hearing about Spoonflower. In the past, I've ordered fabric from Spoonflower and made a couple of dresses with designs created by artists. 
You can check out the details of this dress and fabric here
And details of this dress can be found here. Having ordered fabric from Spoonflower before, I knew I liked it. The fabric I ordered has a good thick quality which is great for the kind of full dresses that I like to create. So, this past spring, just before I hung some artwork up for our art show, I laid a bunch of it out on the floor and took a couple of snaps with my camera. After the art show, I uploaded the photos to the Spoonflower website and was shocked how stinkin' easy it was to rearrange the works of art to create the desired pattern. 
 In case the artwork on this dress looks a little familiar to you, it's from one of the more popular lessons on my blog: The Chris Uphues Lesson for All! Here's a peak of just a few of the works of art based on that lesson:
Take a look at the work of art above and then the print quality below. Pretty amazing, right?!
 This weekend I decided to cut into this Chris-Uphues inspired, kid-created fabric and create a dress using one of my favorite vintage patterns. Now, I did use a circle skirt pattern for the bottom...so only the bodice was used for this dress. 
Here's a little peak at some of the other fabrics I had made with Spoonflower. I cannot wait to make them into dresses too. 
 Usually I'm all about the big belt but when I tried my big belt on with this dress, it seemed to take away from the print. So I went with a hot pink ribbon for the belt instead. 
 Not wanting to waste even a scrap of this precious fabric, I decided to create a couple bow to be featured at the base of the shoulder straps. 
I'm so excited to wear this dress to school and share it with my students. Big thanks to Spoonflower for working with me on this fabric-making adventure and to Chris Uphues for his constant inspiration. 
 photo signature_zpsd10b3273.png
Read more »